Introduction
Herman Miller has long been synonymous with innovative design and exceptional craftsmanship, and the Classic Herman Miller Aeron chair is a perfect example of that legacy. More than just a piece of office furniture, the Aeron quickly became a symbol of good design after its debut in 1994, rapidly earning its reputation as the best office chair. Today, you can still acquire one of the most popular and enduring office chairs. According to Herman Miller’s sustainability report, millions of Aeron chairs have been sold worldwide, and their value remains strong even in refurbished and resale markets.
Because these chairs are built with such precision, it’s important to know how to disassemble Herman Miller Aeron chairs the right way. Without proper technique, you could easily damage the mesh, crack the frame, or strip vital screws when moving, rebuilding, or repairing one. By contrast, taking the chair apart carefully makes it easier to deep-clean, replace broken parts like casters, armrest, backrest, etc., or prepare it for resale—helping to protect your investment and extend the chair’s life.
This guide will show you how to take apart an Aeron chair step-by-step, what equipment you need, and how to avoid making frequent mistakes.
Why Disassemble an Aeron Chair?
There are a lot of reasons why you might need to take apart a Herman Miller Aeron:
Shipping or moving: It’s much easier to pack, transport, and safely move a chair that isn’t fully put together. Disassembling reduces bulk, prevents accidental damage during transit, and allows for more compact storage or shipping.
Cleaning or refurbishing: Taking the chair apart lets you get to those hard-to-reach places for a true deep clean or refinishing job. Dust, grime, and wear often build up in hidden areas; by disassembling, you can restore the chair’s look and hygiene more effectively, which is especially important for long-term use or resale.
Part replacement: When a tilt mechanism breaks, a seat pan wears down, or the mesh becomes damaged, you don’t need to replace the entire chair. Disassembly makes it possible to change out individual components, saving money, extending the chair’s lifespan, and keeping it performing like new.
Disassembling is also an important stage in getting used Aeron chairs ready for resale and repair for businesses and refurbishers, especially when fixing up Aeron chairs for long-term use.
Not sure if your Aeron chair is adjusted the right way for all day comfort? Learn how to adjust an Aeron chair by Herman Miller and get the most out of every feature.
Tools Needed for Disassembling a Classic Herman Miller Aeron Chair
Make sure you have the necessary tools for the work before you begin:
6 mm hex key – for removing side bolts on the seat.
Torx T25 driver – for removing bolts under the seat and armrests.
3 mm hex key – for removing the backrest bolts.
10 mm wrench – to hold the bolt inside while removing the seat.
Phillips screwdriver – for removing the two screws covering the cylinder.
Gloves – to keep your fingers from slipping or getting pinched.
A blanket or mat – place under the chair to avoid scratches.
Ziplock bags – to keep screws and small parts organized.
Tip: Take pictures or short videos with your phone at every stage. It’s the fastest way to make sure reassembly is correct.
Safety Tips Before You Begin
To minimize accidents or damage, you should always follow basic safety rules when dealing with Herman Miller chair parts.
Some Aeron models feature intricate tension systems or tilt limiters, so you have to remove the tilt and pneumatic elements apart. Before you pull them apart, make sure they aren’t carrying a lot of weight.
- Put the chair on a soft, sturdy surface like a rug, carpet, or padded table.
- Wear hand and eye protection because screws and springs can break at any time.
- Herman Miller suggests always using the correct equipment and being careful when taking the chair apart so you don’t hurt its structure.
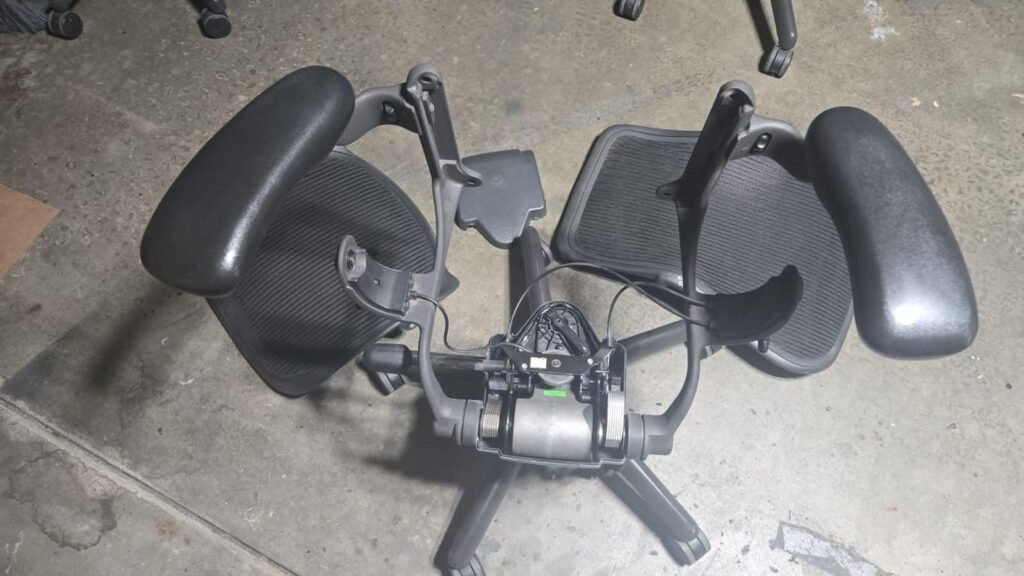
Step-by-Step Guide to Disassembling the Aeron Chair
It may appear hard to take apart a Herman Miller Aeron, but it’s not that hard if you tackle it one step at a time.
Step 1: Remove the Seat


- Use a 6 mm hex key to remove the side bolts on the classic Aeron chair.
- Once those are off, tilt the seat forward.
- Take a T25 Torx driver to remove the bolt under the Aeron seat.
- You will also need a 10 mm wrench to hold the bolt from the inside.
- Once you remove both, you should be able to pop those screws out and fully remove the seat.
Step 2: Take off the backrest

- Use a 3 mm hex key to remove the bolts.
- Once you’ve removed all four, the back comes off very easily.
Step 3: Take off the armrests

Important: Not all armrests come off. Only the ones with dial arm locks can be removed.
Attempting to remove latch arm locks will only damage them.
- To remove the armrest, use the same T25 Torx driver.
- While loosening, make sure you’re holding onto the wheel (otherwise it will just spin).
- The arms that can be removed are wheel armlocks; latch arms do not come off.
Step 4: Take the base and the tilt mechanism apart.


- Take off two screws with a regular Phillips screwdriver.
- Remove the cover, and it will expose the cylinder.
- You must take something — we use a 3/4″ deep socket — place it above the exposed top of the cylinder and knock it out with a hammer.
Alternative tools you can use instead of a 3/4″ deep socket:
- A pipe wrench socket of similar diameter.
- A metal spacer/tube with a wide enough bore to fit over the gas lift.
- A large hex socket (close in size to 3/4″) if that’s what you have available.
The key is that the tool must be deep and cylindrical, allowing it to sit securely over the top of the cylinder without slipping, so you can knock it free safely with a hammer.
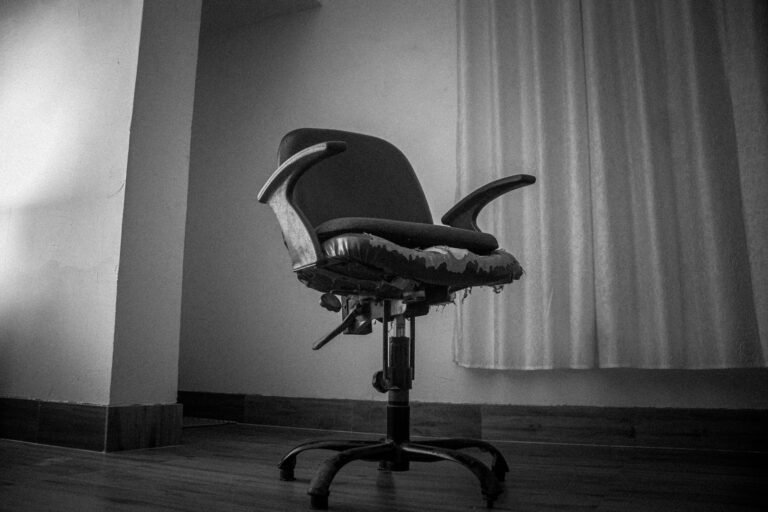
Is your office chair showing signs of wear? Learn how office chair repair can restore comfort and extend its life.
Common Mistakes to Avoid
Even people who are good at DIY might mess up when they take apart an Aeron chair. Stay away from these problems:
- Using the improper tools, like a flathead instead of a Torx, can irreversibly strip screws.
- The Aeron’s unique Pellicle mesh can rip if you bend it too hard.
- Losing minor parts, like a screw or washer, might make it impossible to put things back together.
A study on fixing office chairs discovered that almost 40% of the damage done by users was caused by bad DIY repairs, like screws that were stripped and frames that were fractured. Taking your time and doing things the proper way can save you hundreds of dollars in repair charges.
Where to Get Replacement Parts
A few parts for Herman Miller chairs are hard to find, but here are a few places you can trust:
- Herman Miller Authorized Dealers: Make sure you get real components and keep your warranty.
- Crandall Office Furniture is a well-known company that specializes in fixing up Aeron chairs.
- eBay can be a good deal, but always check the seller’s reputation before buying.
Shop Refurbished Office Chairs at Nulife Chairs
When to Seek Professional Help
There are instances when doing it yourself isn’t the greatest choice. If the gas cylinder is blocked or leaking, call a licensed refurbisher.
- The tilt mechanism is broken.
- The frame is broken, or the mesh is ripped.
Services for professionals: not only can they fix your chair, but they also back it with guarantees on both parts and labor, offering peace of mind that DIY repairs rarely match. Learn more about their trusted repair and refurbishment services here: Nulife Chairs – Herman Miller Aeron Chair Repair.
Conclusion
If you know how to disassemble a Herman Miller Aeron securely, it will keep both you and your chair safe.You can take apart your Aeron for moving, fixing, or changing parts without damaging it if you have the necessary tools, follow the steps, and pay attention to the details.
If the process seems too much for you or your chair requires more than just a quick patch, don’t be afraid to call a refurbishment service like Nulife Chairs for help. If you take care of your Aeron today, you’ll be able to enjoy its ergonomic comfort for many more years.
Frequently Asked Questions
Keep your Aeron safe and save money on maintenance.
Find out the best technique to disassemble a Herman Miller Aeron.


